E21 lock cylinder rebuild
Symptoms: can't turn the key inside the door lock.
Goal: Rebuild the lock cylinder to fix it and make it operable again, maintaining the same key.
Performed on: '83 320is
Applies to: All E21 cars: 320i, 320is, 315, 316, 318i, 323i
Disclaimer: I do not assume any responsibility for the correctness of these instructions or their applicability to the specified models. Use at your own risk! Also, use commons sense, don't do stupid things.
Instructions
- First, if you don't yet have the lock cylinder out, see my door panel removal and lock cylinder removal instructions.
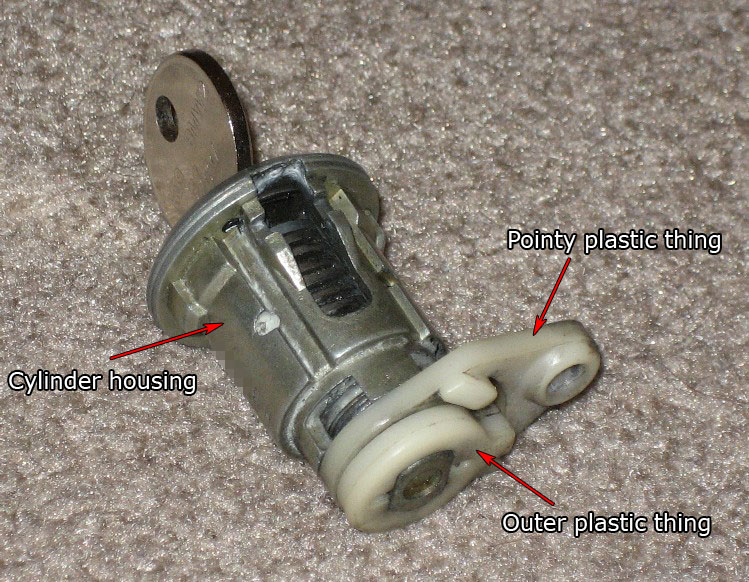
- This is how the lock cylinder looks. I've given my own names to the different parts, so refer to these pics as you're reading the instructions:

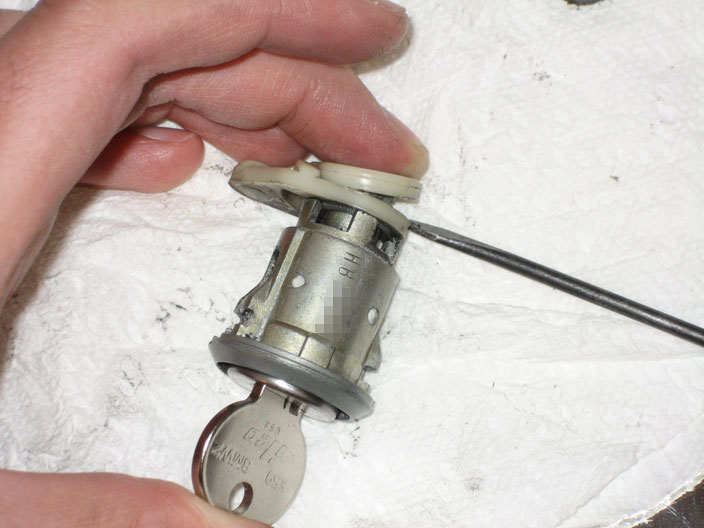
- Pry out the outer plastic thing with a flat-head screwdriver (but don't hold it the way I'm holding it in this picture because you'll hurt yourself... this is just for illustration of the prying). It takes a considerable amount of force to take it off, but it's not held in by anything fancy - it's just clipped on. In order to minimize the risk of braking the pointy part, make sure your leverage point is on one of the metal tabs of the housing. Note that the "tongue" of the outer plastic thing is sandwiched between the two prongs of the return spring. So when you take it out, the spring may move and/or snap and release its tension. That's fine, we'll redo it later. (Note that the spring is missing in the pictures below... again, it's just for illustrative purposes - I took the pictures after I had already removed the spring).
- Remove the pointy plastic thing (it's not held in by anything at this point).
- Remove the return spring if it hasn't fallen out on its own yet.
- If your key wasn't in the lock until now, insert it there.
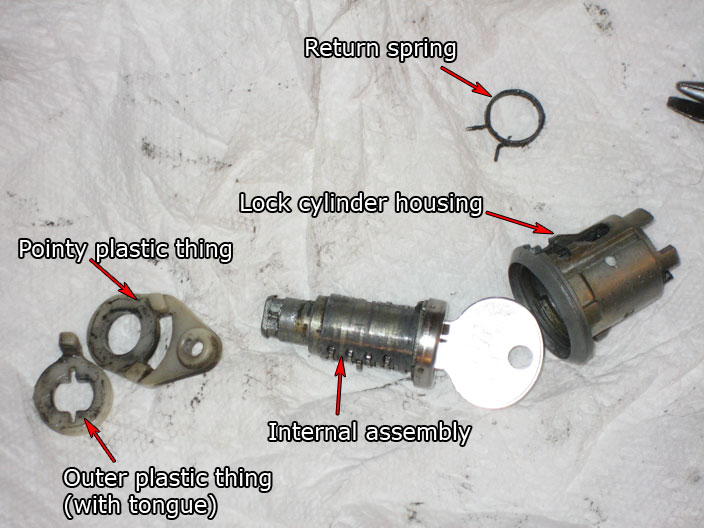
- At this point the internals of the lock cylinder can slide out of the housing. Here's a picture of everything disassembled:
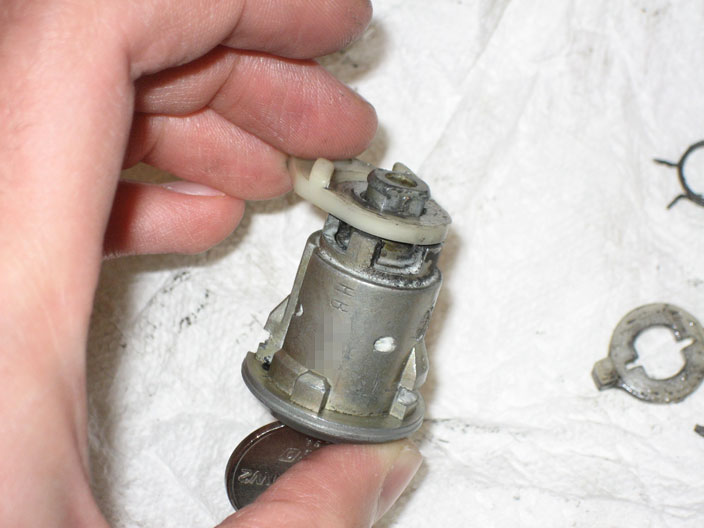
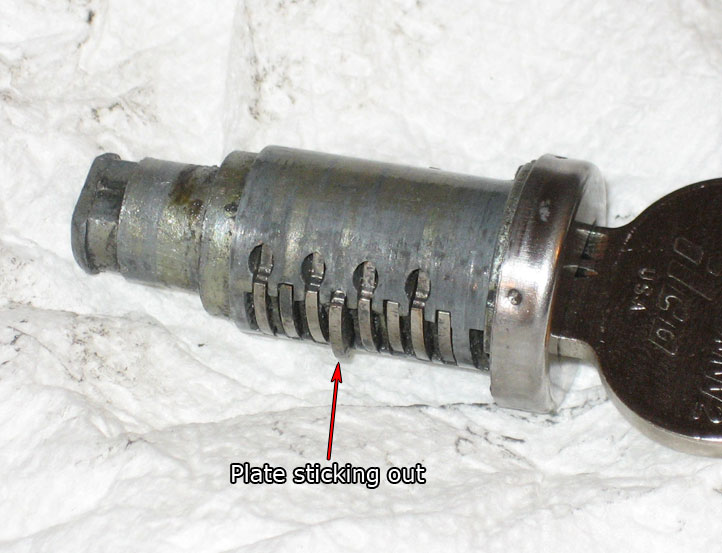
- Check if any of the little lock plates are sticking out. When the key is in the lock, they should all be flush with the surface. Shake the whole thing, turn it upside down, etc, to see if any of the plates move. They should not. If you have a plate sticking out (see picture below), that means you need a new spring for that plate (see next steps for details).
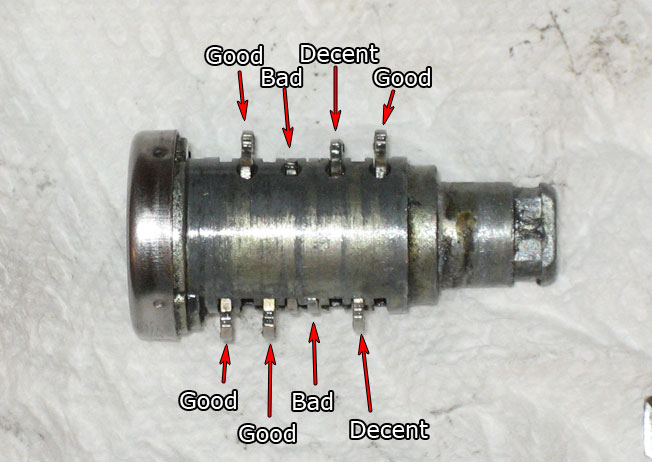
- Slowly pull out the key. The lock plates should all start sticking out now, 4 on each side. With the key out, push each lock plate inward with your fingers to make sure that it springs back. In my case, I had 2 of them not springing back properly (and 2 others decent, but not perfect), which was the cause of my locking problem. This picture shows non-springing plates:
- To rebuild, take it to a locksmith and ask them to replace the little springs under the lock plates. If they don't want to do it for you, just buy the correct-sized springs from them. Here's how to replace those springs:
- With the key out, grab one of the plates with pliers (or even with your fingers) and pull it straight out. It doesn't take much strength to do that. Take out only one plate at a time! (Each plate is different and you don't wanna mix them up and rearrange them - if you do, your key won't work.)
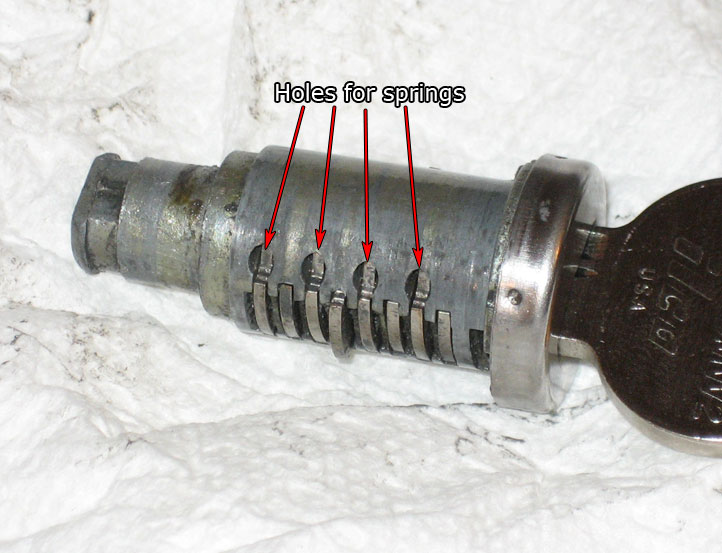
- There is one spring for each lock plate. You'll notice that on one side of the "channel" in which each lock plate slides, there's a round carved-out slot. That is the hole where the spring goes:
- Take out a small sharp object (a tiny screwdriver would work, but it has to be really, really tiny) and poke out the old spring under the lock plate that you've removed. Push in the new spring in its place and put the lock plate back in. Now it should be springy.
- Now you need to reassemble the whole thing. Insert the key in the cyilnder and put the internals back into the housing. Note that there is only one correct orientation of the internals relative to the housing. Once iside, the internals should be able to rotate freely at a 180-degree angle inside the housing. If they don't move, you've put them in the wrong way - you need to take them out, rotate them 180 degrees and reinsert them.
- Put in the return spring. This is a tricky part. In order to do that properly, you need to put tension on the spring: bring the two prongs together and when they meet and pass each other, keep moving them in opposite directions. When they are about 5mm apart, slide the spring onto its place over the lock cylinder. The prongs need to surround the metal tab on the housing (there are 4 such metal tabs... the return spring prongs need to surround the one that's opposite the key code stamp):

- Put the pointy plastic part back on, and rotate it so that it "points" in the same direction as the return spring prongs (i.e. away from the key code stamp).
- Put the outer plastic thing back on, sliding its "tongue" through the slot in the pointy thing. The tongue should also slide in-between the prongs of the return spring (this is very important). Push the outer plastic thing all the way in such that it snaps and stays on. Refer to this picture that you've already seen:
- At this point the assembly should be complete. When you turn the key 90 degrees in either direction, it should spring back to its middle position. If it doesn't that means you haven't installed the return spring correctly. If the key doesn't want to turn at all, that means you've inserted the internals into the housing the wrong way (step 11).